How To Add A Newsletter To Your Website.
How to add a newsletter to your website and it can be done in a few minutes by following this easy guide and video steps.
How To Newsletter Guide and Video.
1. Go to your main Good Web Business Hosting account and login
2. Login to your Control Panel.

Adding A Newsletter: Next Step.
3. Scroll across the top of the control panel header, and you will see Web Tools if you hold your cursor over the tab.
4. Customers with an account will see the URL and domain you have in your account. Select a domain, and then look to the left, and you will see login. Click on the link.
Customers in the sitebuilder demo You will see a friendly Site Builder, Click on the link.
Customers with Accounts You will see the Site Builder Sites, Click on the link.
4. Customers with an account will see the URL and domain you have in your account. Select a domain, and then look to the left, and you will see login. Click on the link.
Customers using the sitebuilder demo can click the Site Builder Demo link as shown in the image below, and then you can select your template as shown in the video.
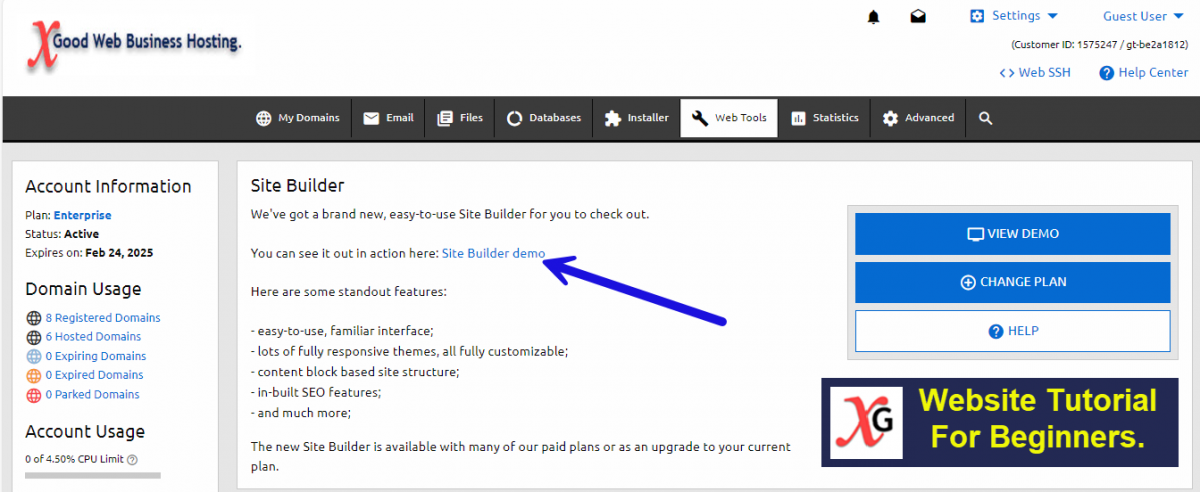
Locating the Newsletter Content Block Tab.
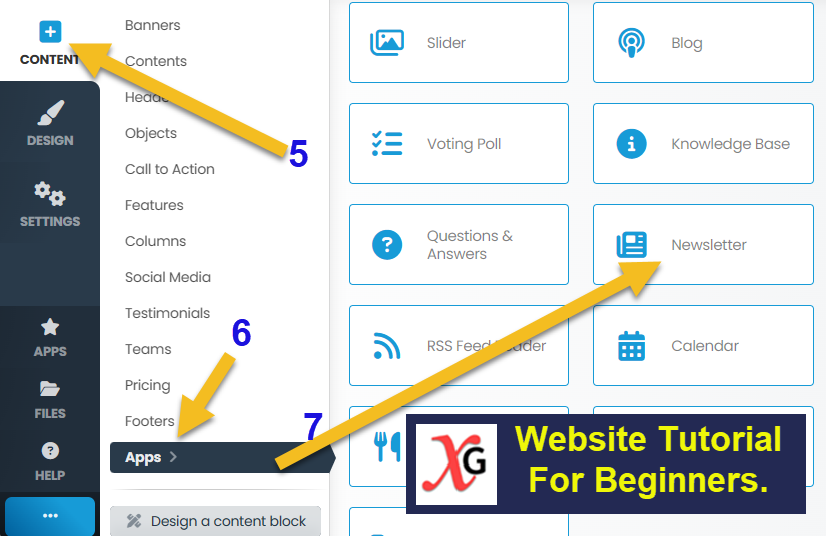
5. On the top left, you will see the Content Tab. Click it. (see image below.)
7. From Apps, select the newsletter tab on the left, and you will see that the newsletter is being added to your web page.
6. Scroll down to the apps.
7. From Apps, select the newsletter tab on the left, and you will see that the newsletter is being added to your web page.
Manage The Newsletter Module.
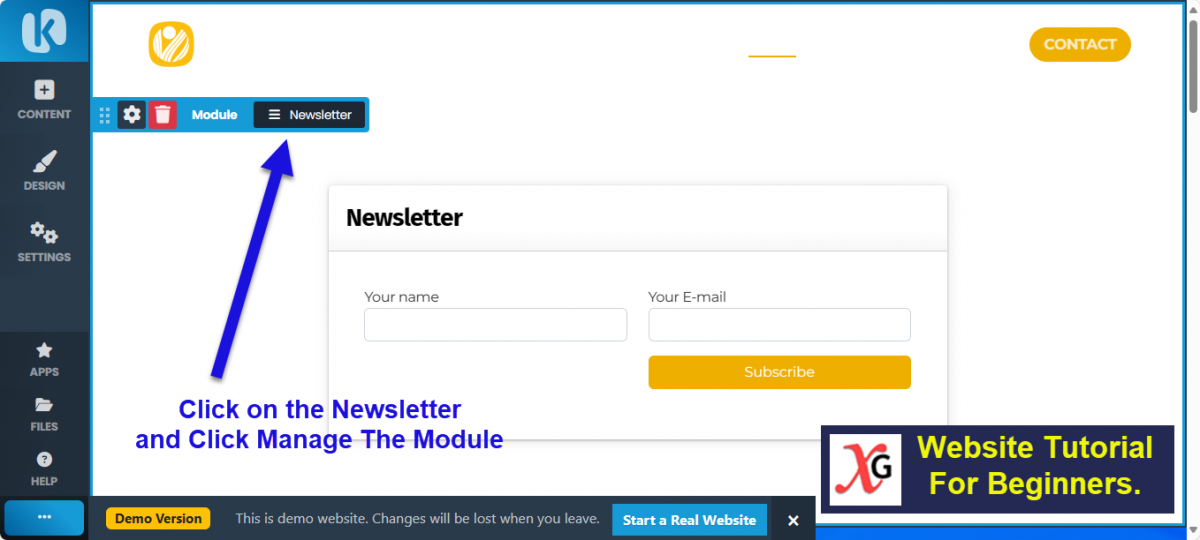
8. Go to the tab at the top that says newsletter (click the one with 3 lines), and then you can click on Manage the Module.
Newsletter Configuration.
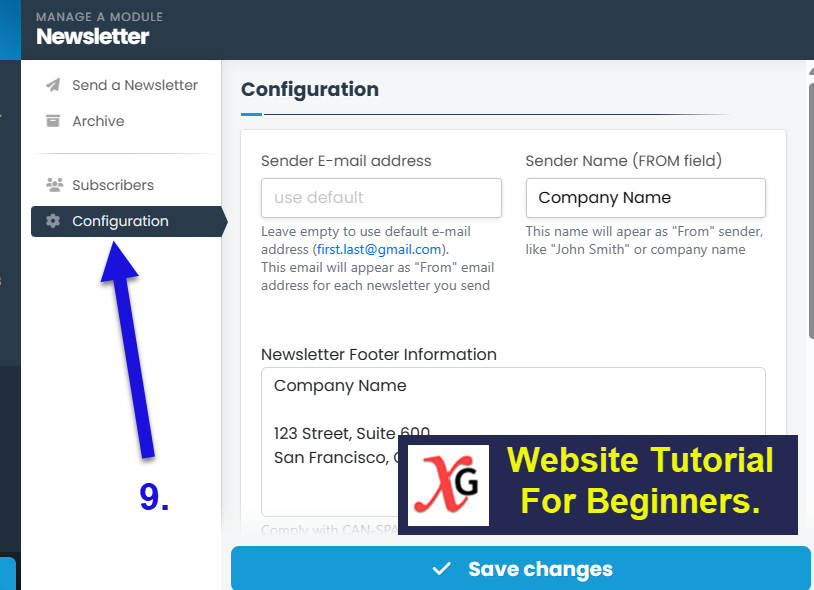
9. Then click Configuration.
11. You can add a "Welcome" message, which all your new subscribers will receive automatically, and within the email, your customer will need to confirm their subscription.
12. You can set a delay (in seconds) between each new message sent out from the server.
13. Now you can invite your customers to join your newsletter.
10. Add your name or business name and footer information, then save the changes.
11. You can add a "Welcome" message, which all your new subscribers will receive automatically, and within the email, your customer will need to confirm their subscription.
12. You can set a delay (in seconds) between each new message sent out from the server.
13. Now you can invite your customers to join your newsletter.
The Newsletter Is Added To Your Website.
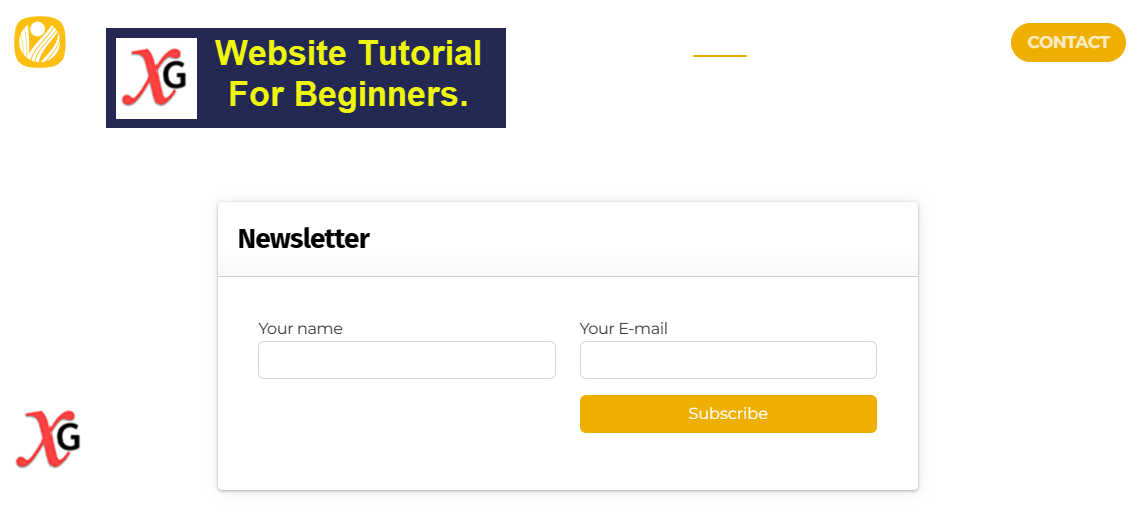
The newsletter is now added to your website You can watch the video below and if you require any further information or have a question, then please Contact Me
